Whittling is the art of taking freshly cut wood and turning it into beautiful, useful objects with minimal hand tools. You can use it to make a variety of lovely objects from spoons to cups to animal figures for children - plus you can carry everything you need in a backpack.
Whittling can be enjoyed literally anywhere and is the perfect craft to take with you on camping trips and other adventures. Once you get started, you'll start viewing every piece of wood you see lying around as an amazing opportunity to create something.

One of the main obstacles people find when they want to start carving is that they don’t know where to get the wood from and they also can’t book a lot of time away to go on a course. In these situations, a pre-prepared craft kit like this one can be a really good idea. All the tools and wood you need are delivered to your door and it also comes with lifetime access to a beautifully produced, 4-hour video course. This means you can learn whenever you have a quiet moment!
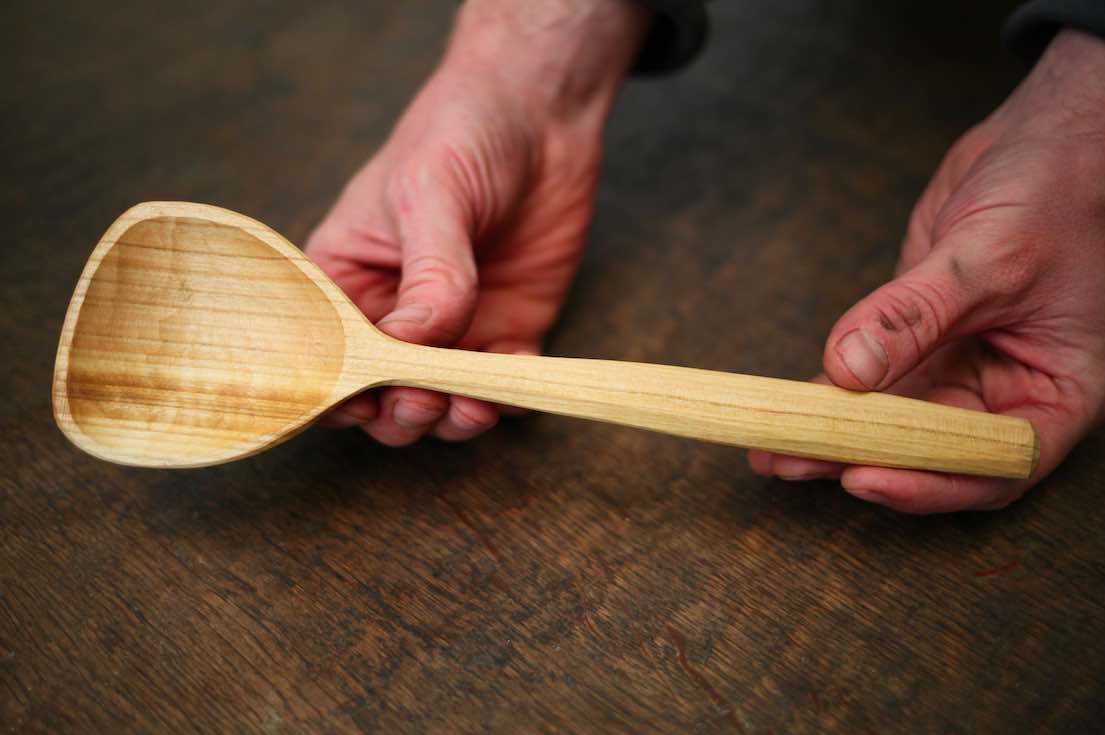
In the above course you’ll learn to make four lovely projects, a simple spatula, a cooking spoon (great for cooking stews), a small eating spoon (great for honing your fine carving skills) and finally a coffee scoop. By the end of the course you’ll have the confidence to start harvesting wood yourself and designing your own projects.

Why is Whittling so good for you?
Wood carving has also long been associated with mental development and wellbeing. Like all crafts, it increases neuroplasticity in the brain, which is your brain’s ability to grow, learn and adapt. It also releases a complex cocktail of wellbeing hormones like dopamine, oxytocin and serotonin, that can have a lasting positive impact on anxiety and depression. Throughout history, it has always been a popular activity among soldiers on the march because it soothes the mind, requires few tools and allows you to make things you could use around camp.
In the late 19th century, the revolutionary educator Otto Salomon recognised that it could be used to help children develop.
Salomon thought that most classroom-based learning in elementary schools was boring, too theoretical and did very little for a child’s personal development. The constant memorising and regurgitation of facts meant that children ultimately grew disdainful of education and misbehaved.
To counter this he devised a syllabus of crafts, which became known as the sloyd movement. This encouraged students to learn increasingly challenging forms of woodwork, starting with whittling. He laid out the potential benefits of his system in the following 10 points:
- To instil a taste for and an appreciation of work in general.
- To create a respect for hard, honest, physical labour.
- To develop independence and self-reliance.
- To provide training in the habits of order, accuracy, cleanliness and neatness.
- To train the eye to see accurately and to appreciate the sense of beauty in form.
- To develop the sense of touch and to give general dexterity to the hands.
- To inculcate the habits of attention, industry, perseverance and patience.
- To promote the development of the body's physical powers.
- To acquire dexterity in the use of tools.
- To execute precise work and to produce useful products.
Salomon said that a child with no training in manual dexterity was only half educated and that is a view that we at MYOWN2HANDS.CO share. Humans are builders, and if we don’t know how to do anything with our hands, an enormous reward centre in the brain lies dormant and we miss out on an essential part of what it is to be alive. Ask anyone who practices a craft, and they’ll tell you the same thing.

What Tools will I need for whittling?
The joy of this craft is that you can get a long way with only 2 small hand tools: the straight knife and the crook knife.
The straight knife is used for general shaping of the wood, and there are many different cutting techniques that you can learn to control the knife better and increase safety. In our course we teach seven cutting techniques for the straight knife, and each one is used in a different situation, depending on the angle of the cut and the direction of the wood grain in the area you are working on. The combination of these two factors makes for a really absorbing puzzle as you turn the piece you’re working on over in your hands.

The crook knife, or hook knife, has a curved blade that allows you to carve out hollows and concave shapes. This includes hollowing out the bowl in spoons, cups and scoops.
The other critical thing you need is a way of keeping your tools sharp. As a general rule it is much better to sharpen your tools little and often. If you let your tools get too blunt it takes a lot of work and more equipment to get them back to a good level of sharpness. In out kits we include a leather strop sharpening system and some special sharpening paste so that you can give your knife a very quick re-sharpen after each use. Sharp tools will lead to much better results overall and a lot more enjoyment along the way. They are also much safer to work with as cutting with a sharp tool requires less force.

What wood do I need for whittling?
One of the tough things about starting out as a woodworker is finding the right wood to make the thing you want to make. Wood is a vast and weirdly intimidating subject and finding it is the number one thing that daunts new learners. Does the wood you have bought have the right grain? Is it the right species? Is it the right state of dryness (seasoning) for carving?
This is why we include four lovely wood ‘blanks’ in our kits. Each one has been pre-shaped to the rough dimensions of each project you will tackle (spatula, cooking spoon, eating spoon, coffee scoop) so that it’s ready to be carved straightaway.
But once you’ve gotten started, you’ll find that looking for wood yourself is one of the most fun aspects of whittling.
In the UK there are many woods that are excellent to use. The best are the ‘leafy hardwoods’. These include Ash, Willow, Birch, Alder and Lime. It’s a good idea to avoid soft coniferous woods like pine as these are less dense and tend to absorb more moisture, which is not what you want if you are trying to carve something useful like a spoon. Fruit woods like cherry are also an excellent choice.
When you harvest your own wood, the fresher it is the better. You want to start working on it while the wood is still ‘green’ or still holding most of its moisture. This is when it is softest and easiest to cut and shape.
If you see any tree surgeons felling trees or come across some freshly cut logs in the woods, it’s fine to ask to take some. You can also contact local park wardens, who are usually very receptive. Once you start looking out for it you will find that there is more than enough available. A huge amount of wood has to be felled each year just to keep the roads, parks and rail lines safe, so get out there and start making a few contacts.
What type of log will I need?
The best piece to start with is a nice clean log that is 6 - 10 inches in diameter, straight grained (free from knots) and doesn’t have any branches coming out of it. Branches also disrupt the grain and make the wood much harder to work. You also need to check that is free from rot, especially if it’s been lying on the ground.
Once you’ve found a log, you can easily split it down into smaller using a hatchet and mallet, which is a really fun process. Then you’re ready to start shaping with your knives.

To keep the wood moist during storage you will need to keep it away from heat and sunshine. Some people even store their small billets in the fridge to keep them moist!

Our wood blanks are made of Bass wood, which will make very nice spoons but is still soft enough to be a great wood for beginner carvers. Once you’ve done a few initial projects, your confidence will increase and you’ll be ready to start looking for your own wood.
A word on safety.
Whittling requires the use of sharp tools and there is a small risk of cutting yourself. To mitigate this, it is important to pay close attention to your cutting techniques as these are designed to make is very difficult for you to cut yourself. You always cut with the blade angled away from your body and you position your hands in a way that tightly controls the direction of the blade’s travel. We also recommend buying a pair of knife resistant gloves. These can be bought for only 10 pounds and will protect your fingers while you are getting started. You don’t have to wear a glove on your knife hand, it's more important on the hand that is holding the object you’re carving.

Designing you own projects.
The real joy of learning to whittle is when you start designing your own projects as there are an unlimited number of shapes and styles to explore. The best way to get started is to spend some time on a platform like Instragram looking for designs you like. Then take this inspiration and do a life-size drawing of what you want to make on a piece of paper, viewed from the top-down perspective.
To transfer the design onto your piece of wood, cut it out and stick it to a piece of card (we use old cereal boxes!). Cut this out again and this will make a template that you can then draw around on your piece of wood with and pencil. This will transfer the exact shape you want to create onto the wood. Once you’ve done that you can get on with cutting the wood down to the basic shape required and then refining it into the finished product. Simple as that!
What sort of finish should I give my whittling projects?
There is a big controversy in the world of green woodwork over whether so use sandpaper to finish off a piece or just rely on the multifaceted finish provided by a sharp knife. Our view is that this is entirely up to you, although excessively sanding a piece that you have worked hard on can make it lose some of its handmade character. Some people refine the finish on a spoon by rubbing it all over with a round pebble which can be a nice happy medium.
If you’re making something that you want to use for cooking or eating, it’s not a bad idea to apply a food-safe oil to it. Our kits include a nice little bottle of linseed oil that you can apply to your finished work. Linseed oil is a natural polymer so it will set hard and add an extra layer of protection for cooking and eating.
Thanks for joining us!
We really hope you’ve enjoyed our guide to getting started with whittling. If you have any questions about our course and kit then drop us a line at hello@myown2hands.co.
If you’d like to watch a free lesson which take you through a few knife skills then just go to the course page and click ‘watch free lesson’ at the top of the page.
Our kits make wonderful creative presents, and they are also great to do in a group. If you buy more than one you get an automatic 20% off!
We would be delighted to help you get started.
If you'd like to read more about crafts, check out our blog on how to weave a willow basket, six amazing baskets you can weave from home, or why learning to make things together is by far the best way to spend time with family and friends.